PDF Accessibility
Converting Documents to PDF
Overview
A great deal of effort is often devoted to remediating PDF files with accessibility issues. Most of this work can be avoided by choosing a source document that supports conversion to an accessible PDF. This article focuses on Microsoft Office 365 source documents exported to PDF using Acrobat.
WebAIM offers a four-week online course on Word, PowerPoint, and PDF accessibility.
Source Documents
Not all applications support the creation of accessible PDFs. The following table lists some common applications and the quality of the tags structure that they can export:
| Source Application | Good tags structure | No/poor tags structure |
|---|---|---|
| Adobe Illustrator | ✓ | |
| Adobe InDesign | ✓ | |
| Canva | ✓ | |
| Google Docs | ✓ | |
| Google Slides | ✓ | |
| Microsoft PowerPoint | ✓ | |
| Microsoft Word | ✓ |
Microsoft Office
Microsoft Office documents keep accessibility information intact when properly converted to PDF. For example, a document created with accessibility in mind in Word should contain almost all the information necessary for an accessible PDF, including:
- Headings
- Images
- Alternative text
- Decorative images marked
- Table structure
- Descriptive links
- Lists
- Columns
- Legible text size
- Good contrast
- Document title
After the PDF conversion, some cleanup in Acrobat may still be necessary. Images flagged with "Mark as decorative" in Office 365 will be hidden in the PDF, but this will need to be done manually in older versions of Office. Tables with multiple levels of headers require more significant work (which should encourage creating simpler tables when possible). But these examples are exceptions—other accessibility information should carry over cleanly.
Recreate the source document
When a PDF is untagged, or has an incomplete or incorrect tag structure, it is often best to return to the source document, make the necessary accessibility repairs, and then re-create the PDF. If the source document is unavailable, use Acrobat to convert a PDF back to a Word, PowerPoint, or Excel file to create a new source document. Select , then choose the desired format.
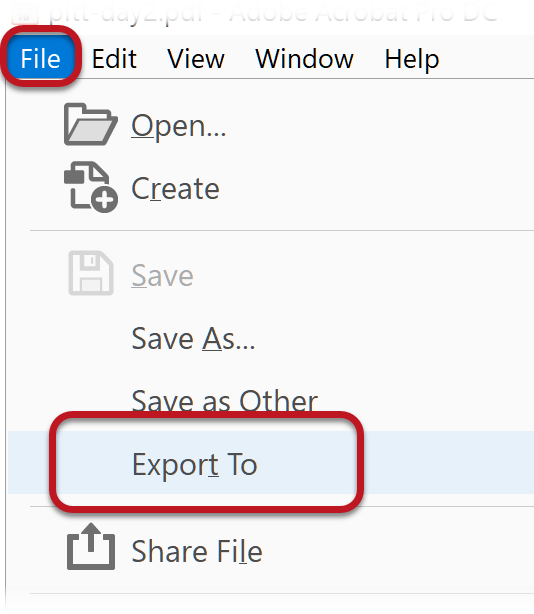
You can then make the necessary accessibility changes, then re-export to PDF.
Acrobat PDFMaker in Office
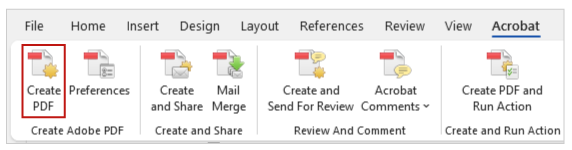
When you install a compatible version of Acrobat on your computer, Adobe also installs an add-in called PDFMaker that adds a tab labeled "Acrobat" to Word, PowerPoint, and Excel. PDFMaker allows you to create a PDF without leaving Office.
Windows
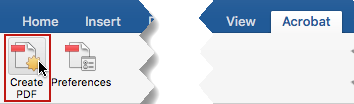
To create a PDF from Office on Windows, select the tab, and click .
- If you have Acrobat installed and do not see this tab, see Adobe's troubleshooting article.
- On Office for Windows, Selecting accomplishes the same thing as using the Acrobat Tab.
A PDF created with the Acrobat tab on Windows is identical to a PDF created directly in Acrobat.
Mac
On Mac, the Acrobat tab works correctly in Word and PowerPoint. To convert an Excel file to a tagged PDF, you must create the PDF in Acrobat.
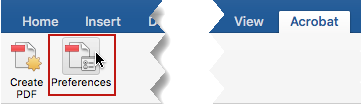
Before creating your first PDF in Word, some setup is required. Click the button on the tab.
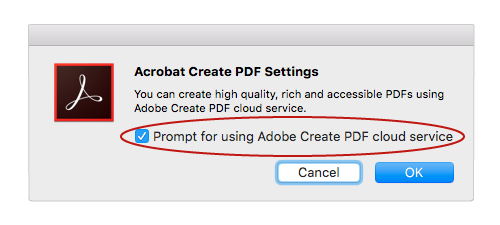
Then, check the checkbox and click .
To create a PDF:
- Click on the Acrobat tab.
- The Adobe Create PDF dialog appears. Check the box, and then select . You only have to do this once

- Select from the dialog that appears.
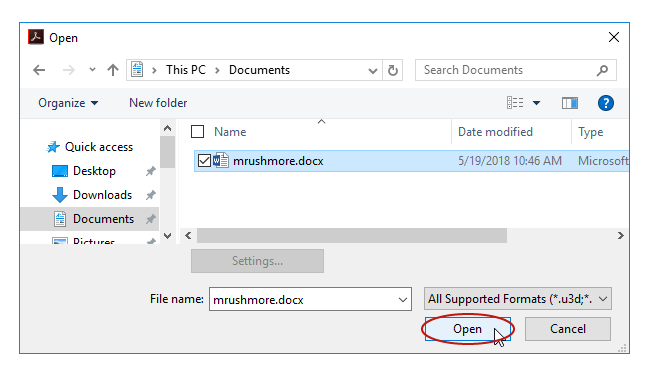
- Save the file after it opens in Acrobat.
Enabling tags in PDFMaker
PDFs created with PDFMaker should be tagged. If they are not, select from the Acrobat tab.
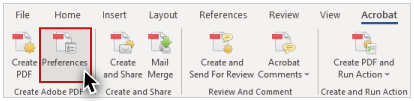
And check the checkbox.

"Save As" PDF in Office
Saving as a PDF in Office allows you to create tagged PDF files without installing PDFMaker or using Acrobat.
The tagging process is more effective with PDFMaker, so we recommend using Acrobat (or the Acrobat tab in Office) if possible.
"Save As" on Windows
To create a PDF in Office, Select . Open the file type menu, select the file type, and choose .
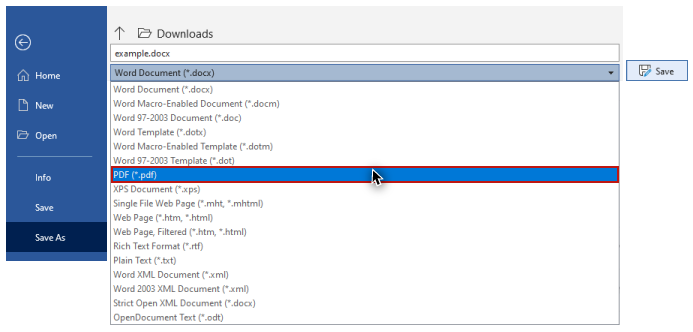
This should create a tagged PDF by default. If it does not, choose before you save the file. A new window appears. Select , make sure is checked, then save the file.
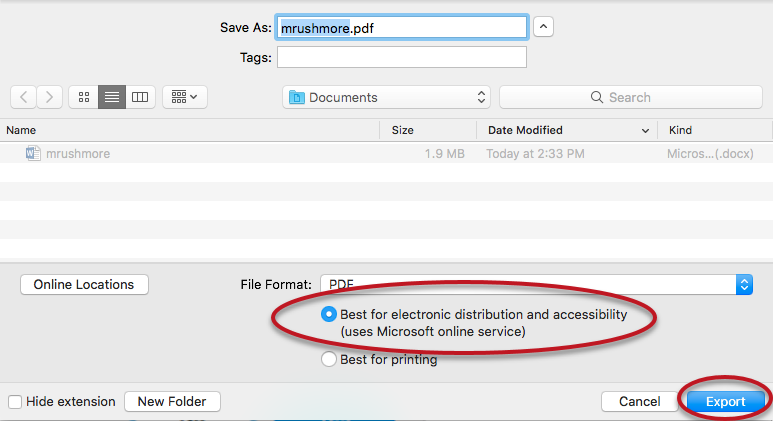
"Save As" on Mac
On Mac, the "Save As" option only creates tagged PDFs in Word in Office 365. Open the application menu and select Under on the dialog that appears, select . Then choose the radio button, then .
If you do not see this option, your program does not support creating tagged PDFs. PowerPoint cannot export a tagged PDF in any version of Office for Mac.
Never create a PDF with the "Print"option in Office, or in any other program. A screen reader user may still be able to access the text of a PDF created in this way, but heading structure, alternative text, and any other tag structure is lost.
Creating PDFs in Acrobat
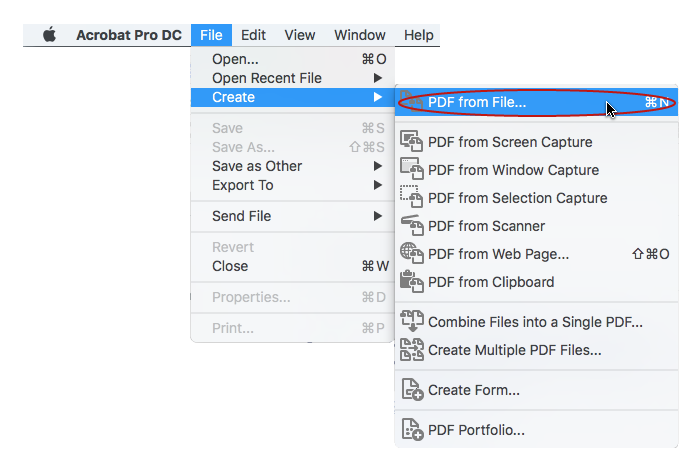
To create a PDF in Acrobat Standard or Pro, select .
If you are on Mac, there is an additional step in this process. After selecting the file to convert, check the checkbox, and then click "Open."
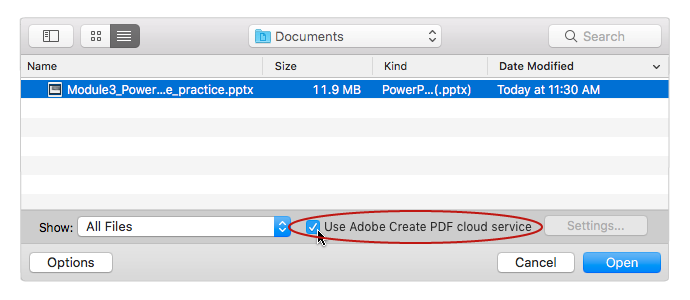
Acrobat should remember this selection for future PDFs, but it is probably best to confirm this checkbox is checked every time you create a PDF. PDF files created using Adobe's cloud service may not look identical to the source document.