PDF Accessibility
Reviewing and Repairing Accessibility in Acrobat
While changes to document structure should be made in the source document whenever possible, there may be times when you want to change a PDF after it has been created. Below are some steps and techniques for common repair situations.
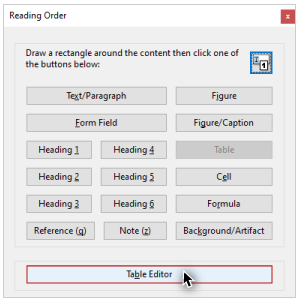
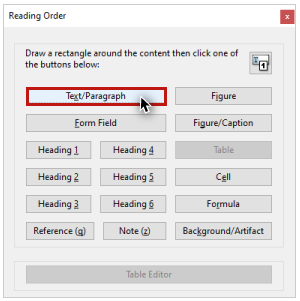
1. Make Easy Repairs With the Reading Order Tool
After you have identified issues flagged by "Accessibility Check," you should review the PDF’s structure. Open the tool, make sure that "Show page content groups" is checked, and enable "Structure types."
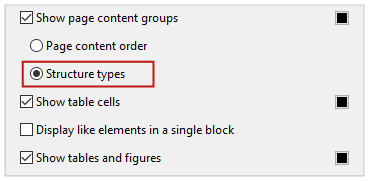
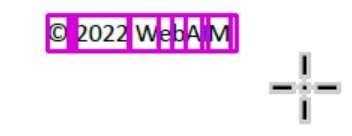
With this option selected, tag labels are displayed in the top-left corner of each element's region.
Deleting structure
It is sometimes necessary to delete existing structure from a specific item or area before adding new structure, especially if creating multiple tags in one action (e.g., defining a new Table tag). To delete the tag from an item—or tags from a group of items (e.g., a list)—select the label on the item's region.
, and select from the menu.
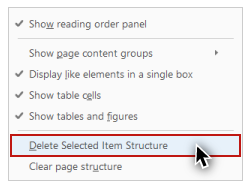
To delete the structure from an entire page, click anywhere on the page, and select the button in the tool dialog.
![]()
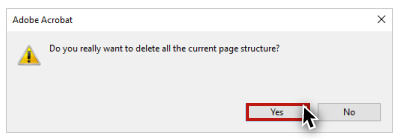
A dialog appears with the question "Do you really want to delete all the current page structure?" Click the "Yes" button.
Headings
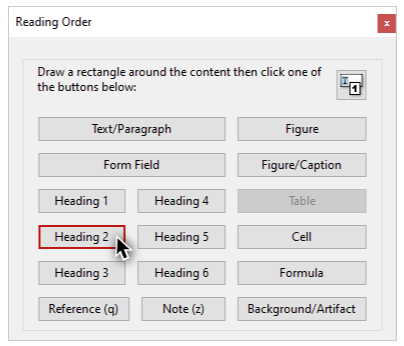
A good heading structure is often the most important accessibility consideration in PDF documents. When heading levels are skipped—for example skipping from <H1> to <H3>—this issue should be identified in the Accessibility Check results as: "Appropriate nesting - Failed". To fix this issue—for example by converting an <H3> tag to an <H2> tag—click on the label in the top-left corner of the element's region to select that element.

Then, choose the new tag type from the Reading Order dialog.
Figures
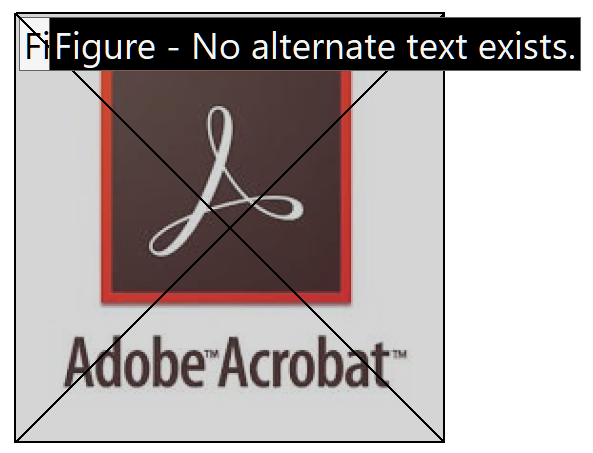
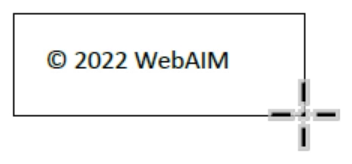
Images in source documents are usually correctly tagged as a <Figure> when exported to PDF. If an image has alternative text, it appears as white text with a black background in the label in the upper-left corner of the element's region.

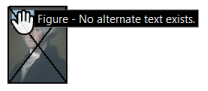
If a <Figure> has no alternative text, The Accessibility Check results should flag this issue with a "Figures alternate text - Failed" error. When using the Reading Order Tool, the label on the element's region displays the text "Figure - No alternate text exists."
To add or change alternate text, on the image and select . Then, enter the appropriate alternative text in the dialog box.
Decorative figures
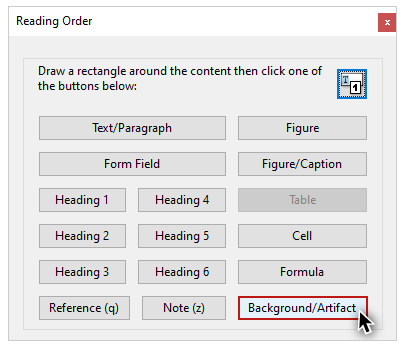
When an image has no content or function, it should be hidden from screen readers. To identify an image as decorative in Acrobat, select the Figure label on the image's region.
Then click "Background/Artifact" on the Reading Order dialog.
The image is no longer tagged, so it is removed from the tags tree.
An image in an Office source document that has been marked as decorative is usually tagged as a paragraph (<P>), and will not be presented to screen reader users.

Tables
In order to be accessible to screen reader users, all header cells in a table must be identified. At the time of this writing, PDF files with tables created in Word and PowerPoint source documents that have correctly-identified headers are tagged with the proper headers and header scope. However, this only works for a single row and/or column of headers. More complex tables, or tables created with other tools, will require cleanup.
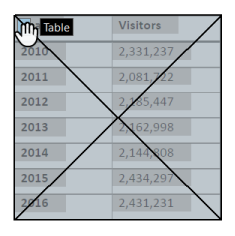
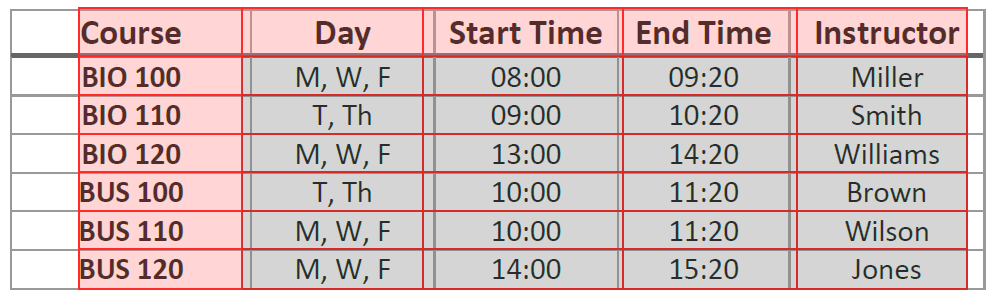
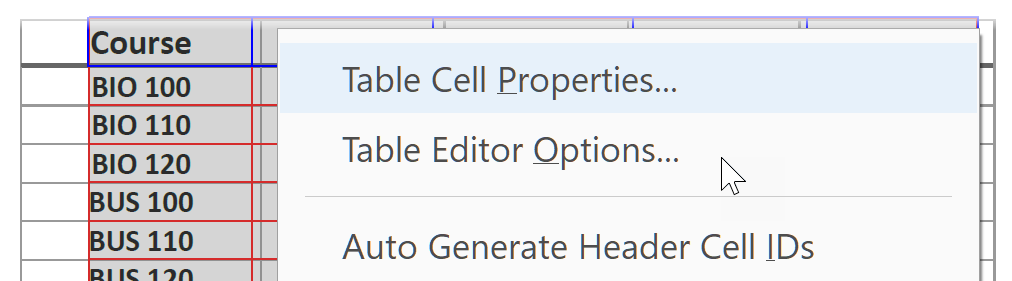
The Table Editor allows you to review which cells are tagged as headers, check their scope, and change or add scope when needed. With the Reading Order tool open, click the Table tag label in the top-left corner of a table's region.
Then select .
With the Table Editor enabled the header cells are highlighted in red and the data cells are highlighted in gray.
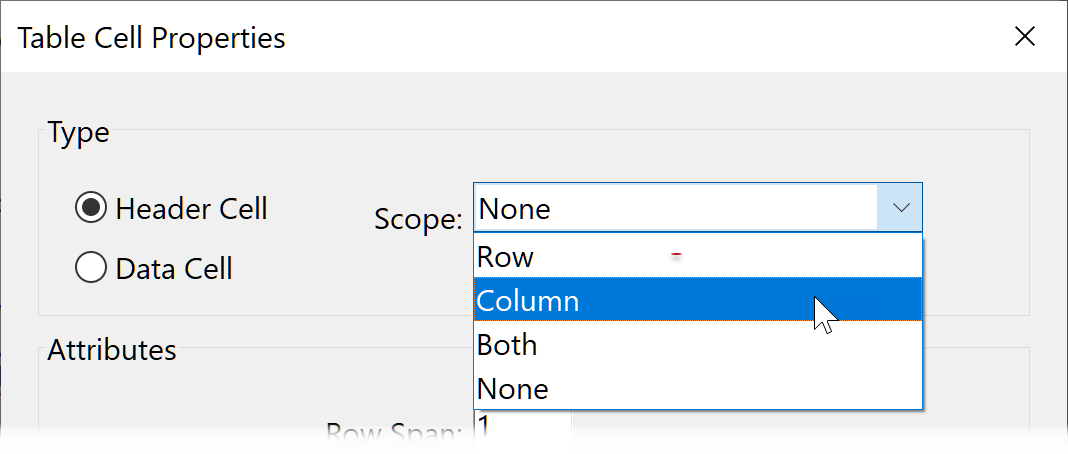
To review or set header scope, click and drag to select any number of column or row headers. on the selected cells and choose .
A dialog box appears. Ensure that "Header Cell" is selected for , and then select the menu and make sure the proper header scope is identified (never choose "Both" or "None").
Adding untagged content
By default, header and footers in documents exported from Office are not tagged. This is so screen reader users won't hear them repeated on every page. We recommend tagging each unique header or footer instance once, usually on the first or last page where it appears.
Tagging untagged content with the Reading Order tool requires the use of a mouse. For example, to make the first instance of text content in a footer available to screen readers, with the Reading Order tool open, click and drag a box around the text.
When the mouse click is released, the individual components in the items should be highlighted.
Click the button for the appropriate tag type on the Reading Order tool—in this case "Text/Paragraph."
The footer text is now surrounded by a region labeled <P>.
The element is now added as a new object in the Order panel, and new tag in the Accessibility panel.
2. Fix Remaining Issues With the Accessibility Tags Panel
It is usually easiest to add or change tags with the Reading Order tool, but it can't do everything. For example, it doesn't have options to create a list. The Accessibility tags panel also allows a user to add, change, and delete any tag.
Find Tag from Selection
To see if content in the page is already tagged, click on the Tool (![]() ). Next, select the object. Finally, go to the menu at the top of the panel and then select .
). Next, select the object. Finally, go to the menu at the top of the panel and then select .
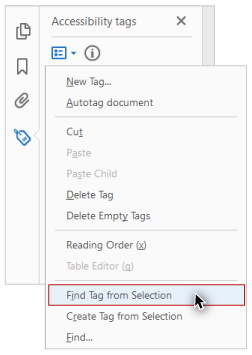
This highlights the tag or tags that contain the selected content.
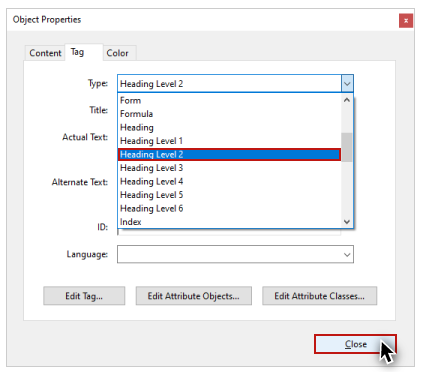
Changing and deleting tags
If the highlighted tag is not the correct one, you can change the tag type. the tag to be changed and select . Click on the dropdown, select the desired tag, and click "Close."
To delete a tag from the tree, click on the tag (or navigate to it with the arrow keys), and press the Delete key.
When a tag is deleted, the content that was inside this tag will no longer be presented to screen reader users.
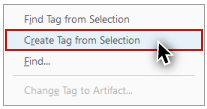
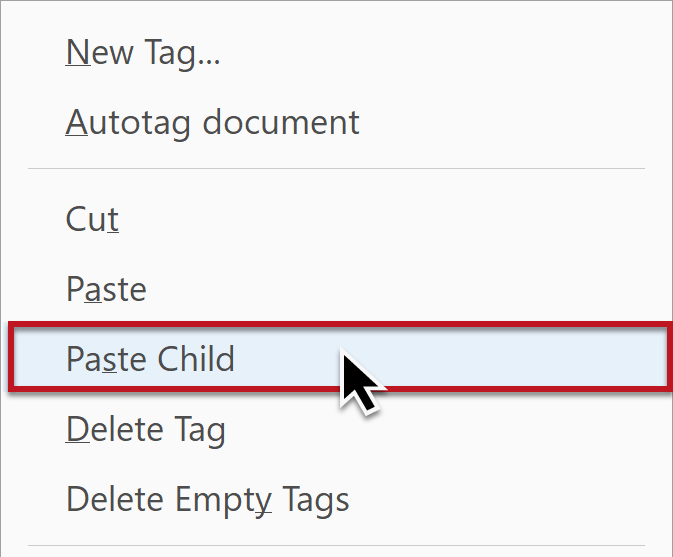
Create Tag from Selection
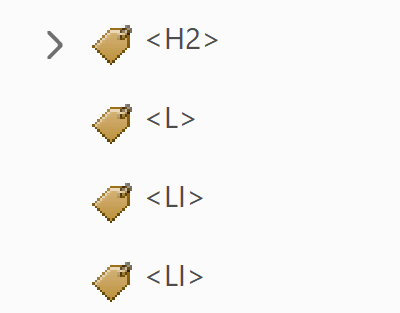
If no tag is located for the selected content, you can create a new tag that contains the selected content. For example, select the text in a list item, click the menu and select
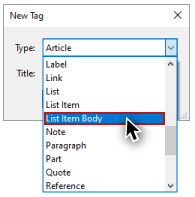
The "New Tag" dialog will appear with a list of available tags. Choose "List Item Body" to create an <LBody> tag.
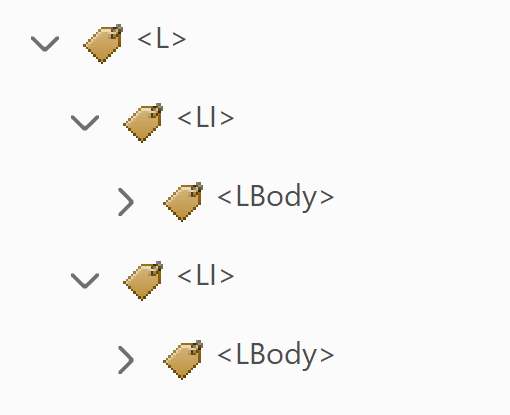
New Tag
Sometimes, you may need to create a new tag and move other tags inside it. For example, a list requires a "List" tag (<L>) for the entire list and a "List Item" tag (<LI>) for every item within the list. To do this, on the tag that precedes the location of this new tag, select, , and choose the desired tag type from the "New Tag" Dialog. Repeat this until all new tags are created.
Then, reorder or nest tags by clicking and dragging with a mouse. To reorder or nest tags with a keyboard, use the arrow keys to navigate the tags tree and the , , and menu options.
In the case of a list, nest the <LI> tags within the <L> tag. Then nest one <LBody> tag within each <LI> tag.
3. Review and Repair Order
Use the Order panel to review and repair the order of a PDF's content containers and objects. As a change is made to this content order, Acrobat may try to adjust the position of the element in the tags order, so you must then use the Accessibility tags panel to review and repair the order in the tags tree.
Content order
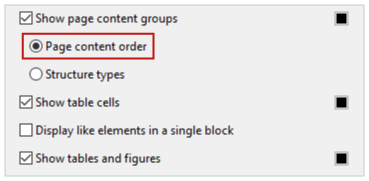
To see the content order of the regions in the document pane, open the Reading Order tool, make sure that the "Show page content groups" checkbox is checked, and select the "Page content order" radio button.
Order panel
Open the Order panel by clicking the button on the Reading Order tool, or by clicking its icon on the Navigation pane.

Not all content objects visible in the Order panel are shown in Reflow. For example, an image identified as a "decorative figure" is not visible.
The Order panel groups content by page.
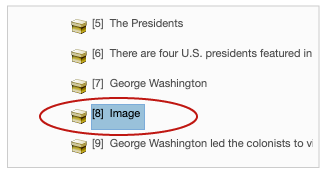
Image bug
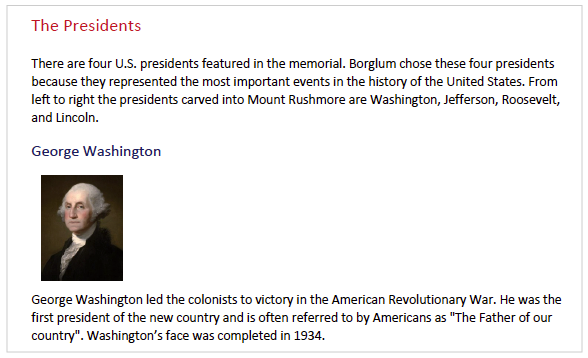
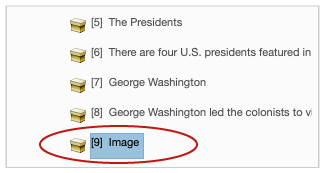
Images from Word source documents are placed last in a page's content order. For example, in this screenshot an image of George Washington is visually positioned between a Heading 3 and paragraph text.
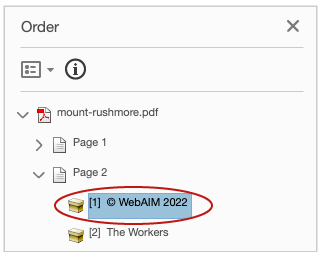
This image is located in the correct place in the tags tree, but when the order of these content objects is reviewed in the document pane, the numbered label on this image's region shows that it is last in the page's content order.
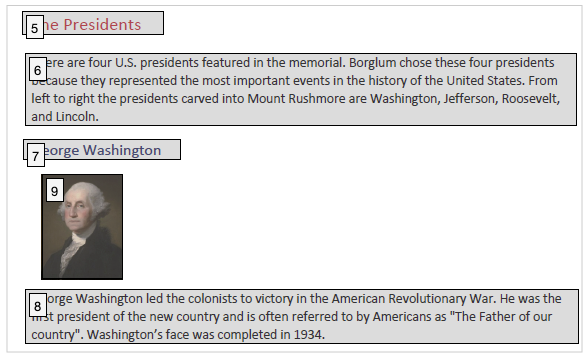
This is also conveyed in the Order panel.
Mouse users can fix the content order by dragging and dropping a content object into the correct position.
Keyboard users and mouse users can also fix a content object's order by selecting and cutting it, selecting the content object above its correct position, and pasting it.
Added content
When content has been tagged using the Reading Order Tool, Acrobat usually places the new content object first in that page's order. In the previous example where the footer text was tagged, the content object that was created was placed first in its page container on the Order panel.
Address this issue by moving any new content object to its correct position in the content order.
Tags order
Open the panel on the Navigation pane. All of the tags in the tree are contained in the "tags root", which is labeled "Tags."
An effective method for reviewing the tags order is to start at the root and navigate tag by tag down the tree using the down arrow on the keyboard. When a tag is in focus on the tree, the element that is tagged is highlighted on the document pane.
Pay particular attention to any items whose content object was repositioned using the Order panel. Reposition tags to the correct place in the tree by dragging and dropping—or cutting and pasting—the tags into the correct location to align with the visual order. This sometimes means nesting one tag inside another tag.
Use the Find Tag from Selection tool locate a hard-to-find tag.